|
Bird photography is a constant challenge since the subject is usually small,  may not stay still, moves rapidly from branch to branch, sits in less than favorable lighting conditions and is extremely aware of an approaching photographer. So, as we all can see, bird photography can be frustrating as well as rewarding. Most On-The-Go (OTG) or In-The-Moment Bird Photographers will not spend the necessary time needed waiting in a blind, a hiding place for you and your camera which allows a photographer to get close to wildlife. Most OTG Photographers will not photograph through the night or constantly return to the same spot day after day. The following hints and tips do NOT relate to that particular type of photographer. There is a fine balance between being in-the-moment, enjoying the mountain climb, taking a walk in the park and bird photography. These tips and hints are for the person who is not quite happy with their results, but wants to gain a little more insight on how to become a better bird photographer.
1. Know What It Takes And Set Realistic Goals:
Many of the bird photographs that you admire are a result of research, patience, hours and days of waiting, return trips to the same location, blinds, disappointments, bad weather and the possibility of zero photographs. If you don't have the desire to take bird photography to that degree, then decide on what results you would be happy with based on what style of bird photography you are going to use and what preparation is necessary. You will have bird photography opportunities based on your style of photography, but be realistic on your final results.
2. Study Photographs:
Study photographs that are not a result of photographers using blinds and hours of waiting. Look for photographs that are a product of a photographer being prepared in the field, but not waiting and researching. Try to learn the story behind a photograph from the photographer. Was it taken by someone who was on a hike and happened to see that particular bird? Was it taken in someone's backyard? Was the bird in a captive environment? Was a blind used? Was a flash used? Was it taken a night? Was the photographer just plain lucky and has no other bird photographs that you enjoy? How many photographs had to be taken to get the the one you are looking at? Once you learn the story behind a particular photograph, it will help you along your path of bird photography. You might want to send an email with specific questions to the photographer and you might receive a response back.
3. Passion For The Birds.
Since birds are a very tough subject to photograph, you must have a passion for birds. Bring along a pair of binoculars to locate and enjoy the birds. Even if you don't get that one great photograph, at least you'll get a day of bird watching in. Your desire, commitment and the love of birds will help you along during your constant struggle with bird photography. If you do not make bird photography the
 purpose of the hike or walk, you will have better results with your photography. Let it happen based on your knowledge of bird language and the use of Outdoor Eyes.
4. Bird Language:
By learning the universal bird language, even from your backyard, you will recognize base line of the birds and only then you will be able to recognize a change in the pattern and know what it means. You will see more, understand more and you will be able to have better bird photography opportunities. It will help you progress in your pursuit of bird photography. Learn to understand the language of the birds.
5. Using Your Five Senses:
Learn about your five senses and how to use the five senses for better bird photography opportunities. Make mental notes of each day you go into nature and store them in your memory cards. Recall those memory cards when it is necessary to improve your bird photography opportunities. Learn to use your five senses better with Outdoor Eyes.
6. Photograph Birds Near Where You Live:
If you don't like your bird photographs that were taken in your own backyard, you will not like your bird photographs taken while hiking Rocky National Park. You don't end up with better bird photographs just because you are in a more dynamic area. Remember, your talent stays with you no matter where you travel. Practice first in your own backyard.
7. Photograph Birds Early & Late:
Birds are active feeding early in the morning and late afternoon. If you arrive at your destination at 10:00am and hike until 2:30pm, put your camera away and just enjoy your hike. Once you understand the rhythm of nature and the habits of the birds, you won't be anticipating bird photography opportunities that will not exist due to the time of the day.
8. Understanding The Light:
You will have the benefit of more dynamic lighting in the early morning and late afternoon, which happens to coincide nicely with the activity of the birds. Spend the middle of the day enjoying yourself or scouting for possible bird photography opportunities. Even if you happen see some interesting birds during the middle of the day, the light will be less interesting and less favorable (especially during the summer months).
9. Understanding Migration:

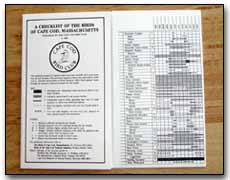
If you are in an area where birds leave and return, there is usually a printed migration guide available for your area. The guide folds up, fits in your pocket and should be carried by you at all times. Don't look to photograph a Cedar Waxwing if the bird isn't due to arrive back into your area for another 2 1/2 weeks. The best time to photograph a specie of birds is when they have just arrived back into your area.
10. No Leaves Make It Easier:
If you are in an area with deciduous trees, it is easier to see and photograph birds without leaves. I realize that the background of foliage adds a dimension to the photograph, but it will be easier to practice bird photography if you can see them and hear them instead of just hearing them. Also, there will be more light to work with when the trees have only buds and no leaves.
11. Use The Longest Lens Available:
Birds are small and you have two options for bird photography: Use the longest lens available to you or learn how to approach birds without scaring them away. Learning the language of the birds and seeing through Outdoor Eyes will help you get closer to the birds.
12. Treat The Birds With Respect:
The safety of the birds is a prime goal to all of us. Do not put any birds at risk or in danger for the sake of a photograph as it will eventually hurt some birds as well as ruin your reputation as a photographer. Obey all the rules of the land and the laws of nature. You will be rewarded with bird photographs in the end.
13. Identify The Bird If Captive:
If the photograph of the bird happens to be of a captive bird, the caption of the photograph should indicate that the bird was captive. Your reputation as a photographer should be a prime consideration and the decision to identify a captive bird in the photograph is entirely up to you as you don't want any misinterpretation of the photograph.
14. Decide On Editing:
Digital editing is a controversial topic. You must decide whether or not you are going to indicate if your photograph has been changed with digital editing software (not cropping). Digital editing is changing the photograph by eliminating sections of the photograph that you do not like, changing colors, highlighting areas, adding a leaf over the part of the sky that you don't like, etc. The decision is totally up to you whether or not you indicate that your photograph was digitally enhanced.
15. Luck Has No Part:
Luck does not factor in bird photography, unless you think that it was lucky that a particular bird happened to be in your area just at the right time. This might happen once and maybe twice, but don't rely on the luck factor to continually put you in the right place at the right time. If you rely on luck, you will eventually become extremely discouraged. Not many bird photographers would say that any of their photograph was due to luck.
16. Do Not Feed The Birds:
Do not feed the birds to try to get a better photograph unless it is from a bird feeder in your own backyard. Birds in the wild shouldn't get into a habit of thinking that there will always be food in a particular area because you brought food to attract the birds.
17. Consider The Background:
 Just because you are in the right place at the right time doesn't necessarily mean that the other
elements within the photograph will enhance the photograph or detract from the photograph. Most of the time, birds land in shady, boring spots. Decide before taking a photograph whether the background will add to the photograph or not. Due to lighting, the speed of the bird, the background, how much time you have and all the other factors, you may not have all the options available to you at that time. If the background is boring, blur it.
18. Use The Car:
In certain situations, your car can be used as a blind. Place a bean bag or a car-window clamp on the half opened car window and rest your camera. Both methods will supply the necessary support for bird photography out of a car window. Usually you can get closer to the birds with a slow moving car versus you walking the same path.
20. Stay Low And Approach Slowly:
Sometimes, by staying low and approaching a bird slowly, you might find yourself extremely close to a bird. The added bonus is that you are at eye-level to the bird which gives you the same perspective that the bird sees as well as allowing you to keep the background out of focus.
21. Use The Internet:
Use the Rare Bird Alert Network on the Internet and other resources to notify you of possible rare birds in your area. Also search the Internet for postings on bird sightings from your favorite places that you hike or walk. This will help you in advance to identify what birds are available to photograph.
22. Consider A Monopod:
You may want to consider a monopod with bird photography. The monopod is light and can remain attached to your camera even if you don't use it. Sometimes, I place my camera on a 90 degree angle to the monopod. I take the 12" long section of the monopod and rest it on top of my shoulder while I am taking photographs of the birds. The monopod keeps the camera steady even when it is not on the ground. When the monopod is on the ground, it is easy to follow a bird with the camera... even when a bird is in flight. Learn how to use a monopod.
23. Be Prepared:
Always have the correct telephoto lens and filter attached to your camera. The movement and possible reflection of a filter or a lens suddenly being added to a camera will definitely disturb the birds. There will only be a short time for that bird photography opportunity and that will not be enough time to change lenses, filters and take a photograph.
24. Understanding The Weather:
If it is very hot, cold or rainy, the birds will stay in a protected area to preserve their strength. There will be less bird sightings during the day and less bird photography opportunities. The birds react to the weather the same way that we do: hot get cool, cold get warm and wet get dry.
25. Go Alone:
If you really want to increase your chances of bird photography opportunities, unfortunately you must go alone. It is very difficult to find someone who is constantly in sync with your body language and thought process in the woods. The birds observe you in the same way as you observe them. However, the birds pick up more about you than you will ever pick up about them. If they observe body language that they don't feel comfortable with from the other person, no matter how good you are as a photographer and a observer, you will not have the same bird photography opportunities. It will always be less.
|

