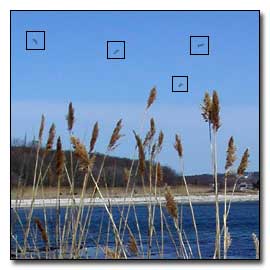
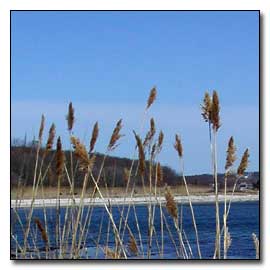
Sometimes the rubber stamp will not remove the blemishes from your photographs. There is another option available to quickly remove those blemishes. The photographs above show a before (with the scratches marked with a square box) and after (with the blemishes removed). The rest of the photograph has remained the same.
How To Remove A Blemish
Note: The history brush will not work properly if the photograph is resampled or the image size has been changed. The snapshots that are indicated below are not saved when the finished photograph is saved.
1. Open the file. Choose File --> Open --> Enter the image name to be fixed.
2. Hold the Ctrl Key down and hit the + key a few times to zoom the image to 100%.
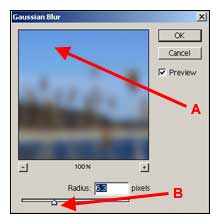
3. Choose Filter --> Blur --> Gaussian Blur. Move the photograph displayed in the Gaussian Blur screen so that a blemish is shown in the screen (A). Move the Radius Bar to increase or decrease the pixels until the entire blemish disappears (B).
Click OK. The history screen will display the gaussian blur as shown below (C).
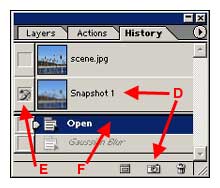
4. Click the camera located on the bottom of the history screen (D). A snapshot of the photography will appear named as Snapshot 1 (D).
5. Select the history brush from the tool box and choose the brush size needed. Use the smallest brush as possible.
6. Click the box on the left side of Snapshot 1 (E). Select duplicate layer on the history screen (F).
7. Slowly paint with the history brush the blemishes that you want to remove.
8. You can add additional snapshots at any time if your image needs additional editing.