|
 If you are going to photograph while traveling on water, the kayak has many advantages over all other forms of watercraft. The most stable kayak for photography is a kayak that is approximately 10' long and 30" wide and constructed from plastic. These have a large cockpit opening so that your photography gear is easily accessible. Unfortunately, most people who paddle in a 10 foot by 30 inch kayak, usually put themselves in danger due to the unsafe practices of either not wearing a PFD (personal flotation device) or wearing unsuitable clothing for cold water paddling. I have seen too many paddlers of small boats being unprepared. In most areas, the safe paddling time for that type of kayak is usually only 3 - 4 months out of the year. Please be careful if you do photograph while paddling in a smaller kayak. Photography is possible in all kayak sizes and shapes. I photograph from a 17' long, 22" wide, kevlar kayak and I also wear a dry suit while paddling during the cold winter months. Learn more about kayak photography in the kayaking photography hints & tips section. Learn also how to protect your camera while kayaking in the protecting your camera section.
Kayak Advantages:
1. The kayak travels in very shallow water which allows you to visit areas that are not accessible by other boats. The kayak is very quite maneuverable in tight areas.
2. You are always facing forward so whatever you can see can be photographed easily.
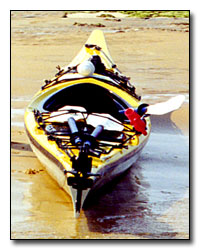
3. Since you are low to the ground and silent, you have an easier time approaching wildlife. Wildlife might react differently to the color of your kayak. My kayak is yellow and my wife's kayak is teal. When we paddle with the seals, they react more favorably to the color teal versus the color yellow.
4. The kayak is very comfortable, so you can sit in the same place for long periods of time.
5. The kayak is very stable, so a long camera lenses can be used.
Kayak Photography Techniques
Filters:
A polarizer filter (circular for autofocus lenses) is very important in reducing the reflection and stray light which is prevalent at sea. With the polarizer filter on, rotate it to see the difference in the how the water sparkles. The filter can also make a washed out sky look bluer when the position of the camera is at a right angle to the sun. Wooden kayaks can be tough to photograph since the glossy layer of varnish will reflect every light colored object, including the sky. They also reduce the light by up to 2 stops which enables you to have more choices in exposure settings. Point your camera at about a 45 degree angle to the water and turn the polarizer filter. You will see the reflections disappear and you will be able to see underwater quite clearly. Graduated filters are also useful to make the sky darker so it matches the landscape. This also can be used to darken the water when you want to have more of a contrast, for example, between cliffs and the sea.
Monopod or Tripod
Depending on the size of the cockpit, a monopod or a small tripod might be useful in helping to control camera shake. If you are paddling in a touring kayak with a sprayskirt, the use of a monopod or a tripod is not possible. They can only be used in a smaller kayak with a wide cockpit. Be sure to have a case to cover the tripod or monopod as either could damage the inside of your kayak. I have also seen the monopod placed into the center cup holder in the kayak seat. The monopod becomes more stable by being contained in the cup. I don't recommend the use of either while photographing from a kayak. I do recommend packing a monopod or tripod in your hatch to use after you've landed on shore.
Fill The Frame:
Make sure you don't have to point at the subject in the photograph and say, "This is the whale." This is what I had to say about some of my photographs when I paddled about 30 yards from the Humpback Whales and all I had with me was a waterproof 35mm disposable camera. Try to get as close to the subject as possible or use a longer lens. Make sure the subject fills a third of the frame.
The Horizon:
Always make sure that the horizon is level (if that is the way it is supposed to look). Make sure it does not appear exactly in the middle of the photograph. Always try to break up the horizon with a kayak, an island, a rock, etc. to make the photograph more interesting.
Emphasize Action:
Try panning to emphasize the subject by blurring the background or blurring the paddle in motion. Try to use motion blur to soften the water.
Overcast Skies:
Watch out for overcast skies. Unless there are dramatic clouds or blue sky, do not include overcast skies in the photograph. Overcast skies, especially on water, create flat lighting.
The Foreground
Add some interesting subjects in the foreground. Kayaks in the top third of the photograph and water in the other two thirds of the foreground usually does create an interesting photograph. When photographing from the water to land from the kayak, try to keep the water in the photograph at a minimum and have the subject in the bottom third of the photograph.
Include The Deck
Try to include the deck of your kayak in your photographs. It puts perspective to how close you might be to a situation as well gives identity that the photograph was taken while paddling a kayak.
Watch Out For The Caps Or Hats
When you are including people paddling in photographs, be aware that most kayakers will be wearing a cap or hat that will darken the subject's face. Be aware of the position of the sun in relationship to the kayaks or the person's face.
Watch Out For Footprints Or Foreign Objects
There is nothing worse than seeing your photograph include a bottle cap, plastic or anything else that has washed up on the beach. Unfortunately, this does happen, even on a remote beach. So look for the footprints that you might not want to be included as well as foreign objects.
Vertical Photographs:
Don't forget to also take vertical photographs for a possible magazine cover. Leave enough area for the name of the magazine and the necessary information on the articles that are included in the issue. If you write articles for magazines, they might just ask you for a vertical photograph for the cover to highlight your article. Vertical photographs also hang nicely on the walls of your house.
Break The Rules:
Sometimes, when an opportunity arises, break the rules and experiment.
| 
