|
 There are several ways to convert color images to Black & White using Adobe Photoshop. These methods can
also be used with other editors. Here I want to share two of the better ways to make these conversions. One uses Channels that are found in the the window that is normally in the lower right corner. It is
titled Channels. The second method is using the Channel Mixer that is found under Images, adjustments
then click on Channel mixer. Both processes are simple and easy to do the work flow to complete the
projects.
There are several ways to convert color images to Black & White using Adobe Photoshop. These methods can
also be used with other editors. Here I want to share two of the better ways to make these conversions. One uses Channels that are found in the the window that is normally in the lower right corner. It is
titled Channels. The second method is using the Channel Mixer that is found under Images, adjustments
then click on Channel mixer. Both processes are simple and easy to do the work flow to complete the
projects.
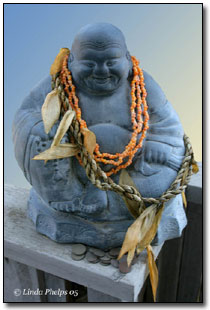
This example has had a small amount of altering to make the Budha stand out more. The Budha was selected and a light amount of poster edges was applied to the Budha only. The messy back ground was replace with a gradient that starts with the blue in the original sky and falls off to a pale gold to add space between the sky and Budha's light sleeve on his arm. Those who judge Black & White prints want to see the whole range from white to black. So the goal is to alter the image to have a very light spot and a rich very dark black in the frame.
Using Channels
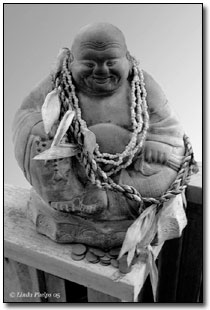
To start the process go to Image, Mode, and click on Lab Color. Click on the Lightness Channel and you will see the image change to a gray scale B&W. At this point, I click on the brightness/contrast under image, adjustments. Here you can tweak your photo until you have a good white and a very dark black.
Using the Channel Mixer
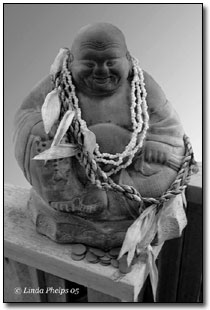
This method allows you to have more control over the final outcome of the Black & White conversion. Start by clicking Image, Adjustments and Channel Mixer. Click the little monochrome box. Now your have a Black & White image. Here is your opportunity to set the channels until you get the image to your personal liking. Again, remember the goal of white and very dark black. The following settings were used; red at 60%, green a 40% and blue was left to 0%. This is just a starting place. So now you can fun playing with the channels. Be sure to use the contrast tool to help adjustment for the white and dark black.
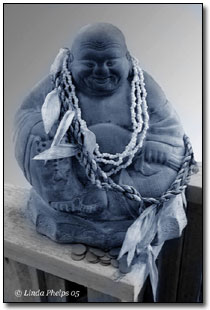
Once you have finished your B&W image, you may want to play around with tinting the whole or part of the image. I have added a blue tint to the Budha only by clicking for a new layer. Next click the color balance layer under the layers menu. Once I was happy with the color tint I used the soft history brush on the side tool bar to remove the color from the background & the foreground. You can select individual parts and color them in with your choice of color or colors. I have added colors that looked like colored chalk was used on the real subject. This is a fun place to play with all kinds of ideas.
| 
