|
We have all seen nice reflections of buildings or other items that have been cropped to only show the
 reflection. Now You can make your own using a couple of Photoshop filters. These filters are in most of the versions of Adobe Photoshop. The examples were done with Photoshop 7.
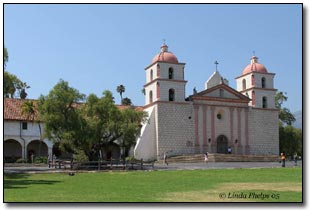
For this example I have chosen a photograph of the Santa Barbara Mission on the California coast (Image 1). This image was cropped a bit for a better composition. You start by clicking on filter, distort & glass. The following setting were used for glass filter. Distortion 14, smoothness 8, texture blocks, and scaling at 127%.
The next step was to remove the remains of the people. Then I turned the image 180 degrees. But now I think it is better to flip it vertically. I had the shadows reversed between the grass and the building once the grass was turned upright. You can see I used some cloning to correct that problem.
If your photo has a clear blue sky like our example you need to add some texture to it. For mine, I used the magic wand tool to select the sky. Then I added a gradient using the sky blue and a little lighter blue for the part near the Mission.
 To make a gradient you click on the top color in the tool bar and pick one color. Then you click on the
second color and choose another color. Click on the gradient tool in the tool box then place the cursor at one end of the sky and pull it to the other side and release your mouse. I pulled mine on a diagonal to add more interest to the sky. Now is a good time to tweak the color a little bit to give the color a tone more like water. I used the color replacement tool under adjustments in the image menu. I used the top slider in the new window that comes up. You could also use the color balance tool which is also under adjustments. To continue, I used the glass filter again on the sky. I adjusted the settings to make the sky show some color blocks that looked more like water. Now deselect the sky.
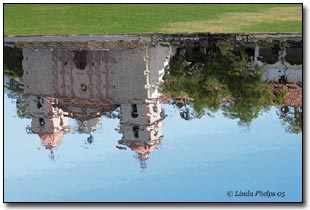
Returning to the whole image I went back to the distortion filter and clicked on shear. I made a slight adjustment by adding the shear in the upper mid portion of the image (Image 2). You can see the effect of the shear filter by looking closely at the right side of this sample. Crop the right side to remove that part.
 To finish up the reflection I decided that the grass needed to be right side up at the top of the frame.
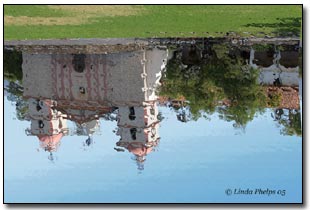
The grass was selected by using the magnetic lasso tool. Then it was flipped vertically. Fortunately there was a row of Spanish bricks next to the water on the left side of the photo. I carefully cloned them along the shore line between the water and the grass. At the end I checked for any little clean up that was needed. There were a few places where the grass was sticking out below the bricks. With that completed we have the final "Reflection" created ( Image 3).
| 
