|
Have you struggled with washed out skies. I have. Sometimes you can't just crop them off. Here are some tips you can use with your editor to help those skies regain some of the natural color as color in the sky can save an image. The following tips will be for use with Adobe Photoshop. I am sure you can convert the names of the items and steps if you use another digital editing program.
1: Select the selective coloring tool under image > adjustments. Click on the check mark at the top box in the window. Now click on white. You can use the sliders to pick a color suitable for a sky in
 your image. Hint: A touch of black or red will help make the cyan a more blue sky tone. Sometimes there are other areas included in the photo that you do not want to turn blue. In this case you want to
select the area you do not want to change with the lasso tool. You may need to invert the selection to keep those areas white when applying color to the sky.
your image. Hint: A touch of black or red will help make the cyan a more blue sky tone. Sometimes there are other areas included in the photo that you do not want to turn blue. In this case you want to
select the area you do not want to change with the lasso tool. You may need to invert the selection to keep those areas white when applying color to the sky.
2: You can also use the magic wand to click on the parts of sky where you want to change the color. First click on the background box at the bottom of your tool box. Now use the slider to select the color to be added to the sky. Apply the magic wand tool to the places that need to be changed. Next use the top eraser tool paint in the background color to your image.
3: You can also completely erase the old sky. Use the eraser tool from the top to change the selected parts to the background color. Next, click the magic eraser in the selected areas and they will be erased to a gray and white checkered background. This space is now empty. Now you can make a gradient sky background for your sky. Click on the foreground and background boxes at the bottom of the tool bar. Use the slider to choose the two tones you want for your sky. You can use a shade of blue and a shade of golden yellow to add a nice glow in the new sky. Click on the gradient tool in the tool bar. Place your cursor where you want to start the sky and draw a line to the place where the sky stops. This method makes a more realistic sky. Just going from a darker blue at the top to a fade to light blue looks better than a flat sky.
I hope these three tips will help you to improve those washed out skies and hopefully might save some of your images from the trash can.
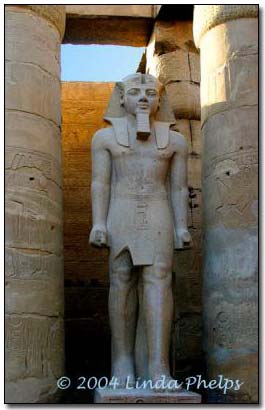
The image above is an example of a pale sky replacing a totally blown out sky. This figure stands between the columns of Luxor Temple in Egypt.
| 
